
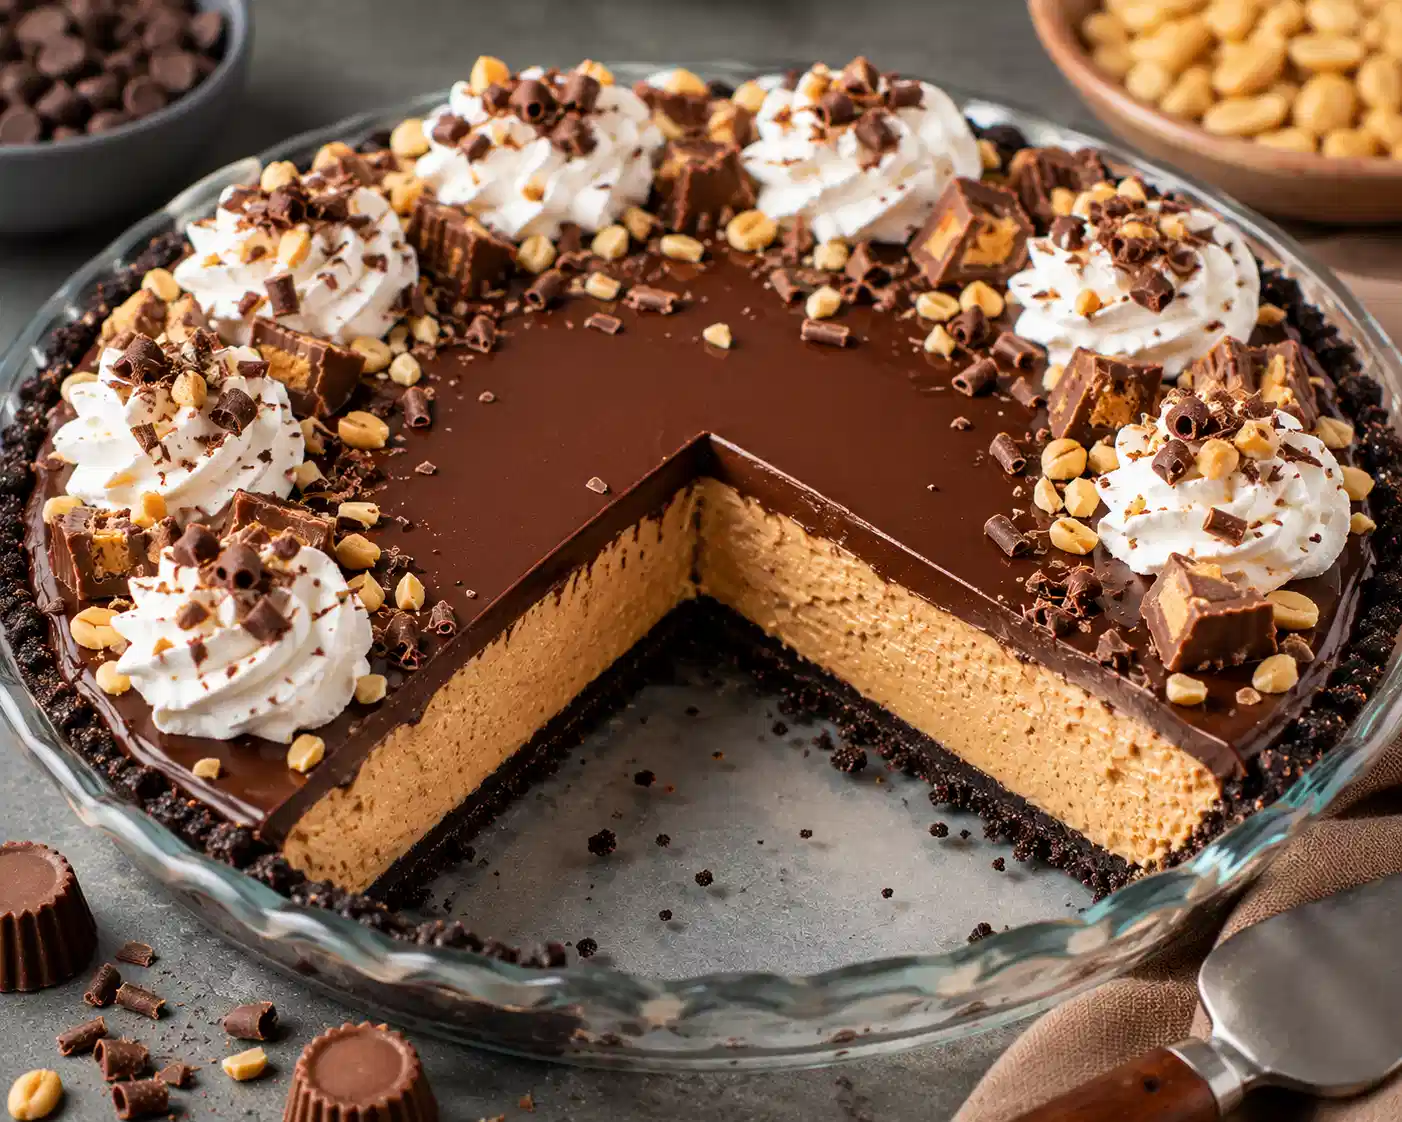
Chocolate and Peanut Butter Pie is the ultimate dessert for anyone who loves the timeless combination of rich chocolate and creamy peanut butter. Built on a crisp chocolate cookie crust, this no-bake pie features a light yet decadent peanut butter cheesecake filling topped with a smooth chocolate ganache. Every slice offers layers of creamy, crunchy, and velvety textures that make it perfect for birthdays, holidays, potlucks, or whenever you’re craving an indulgent homemade treat.
Despite its impressive appearance, this pie is surprisingly simple to prepare. Most of the work involves mixing a few ingredients and allowing the pie to chill until perfectly set, making it an excellent make-ahead dessert.
Why You’ll Love This Recipe
- No oven required.
- Rich chocolate and peanut butter flavor.
- Smooth, creamy, and fluffy filling.
- Perfect make-ahead dessert.
- Great for holidays and celebrations.
- Beginner-friendly recipe.
- Beautiful presentation.
- Easy to customize with different toppings.
Ingredients
Chocolate Cookie Crust
- 24 chocolate sandwich cookies, finely crushed
- 5 tablespoons unsalted butter, melted
- 1 tablespoon granulated sugar
Peanut Butter Filling
- 8 ounces (226 g) full-fat cream cheese, softened
- 1 cup creamy peanut butter
- 1 cup powdered sugar
- 1 teaspoon pure vanilla extract
- 1 cup heavy whipping cream
- 2 tablespoons sour cream
- Pinch of fine salt
Chocolate Ganache
- 1 cup semi-sweet chocolate chips
- ½ cup heavy whipping cream
- 1 tablespoon unsalted butter
Optional Garnishes
- Mini peanut butter cups, chopped
- Chocolate curls
- Roasted peanuts
- Chocolate shavings
- Whipped cream
- Chocolate drizzle
Kitchen Equipment
- 9-inch pie dish
- Food processor or rolling pin
- Mixing bowls
- Electric hand mixer
- Rubber spatula
- Small saucepan
- Measuring cups and spoons
Step-by-Step Instructions
Step 1: Prepare the Crust
Combine the crushed chocolate sandwich cookies, melted butter, and sugar in a bowl.
Mix until the crumbs resemble wet sand.
Press the mixture firmly into the bottom and sides of a 9-inch pie dish.
Refrigerate for 20 minutes while preparing the filling.
Step 2: Make the Peanut Butter Filling
Beat the softened cream cheese until completely smooth.
Add the peanut butter, powdered sugar, vanilla extract, sour cream, and salt.
Continue mixing until creamy.
In a separate bowl, whip the heavy cream to stiff peaks.
Gently fold the whipped cream into the peanut butter mixture until fully incorporated.
Step 3: Fill the Pie
Spread the peanut butter filling evenly into the chilled crust.
Smooth the surface with an offset spatula or the back of a spoon.
Return the pie to the refrigerator while preparing the ganache.
Step 4: Prepare the Chocolate Ganache
Heat the heavy cream in a small saucepan until it begins to simmer.
Pour it over the chocolate chips and butter.
Let the mixture stand for 2 minutes, then stir until smooth and glossy.
Allow the ganache to cool for about 10 minutes before using.
Step 5: Add the Ganache
Pour the cooled ganache evenly over the peanut butter filling.
Tilt the pie gently if necessary to create a smooth layer.
Step 6: Chill
Refrigerate the pie for at least 4 hours, or preferably overnight, until fully set.
Step 7: Garnish and Serve
Decorate with whipped cream, chopped peanut butter cups, chocolate curls, roasted peanuts, or chocolate shavings.
Slice with a warm knife for clean, neat servings.
Chef’s Tips
Use full-fat cream cheese for the creamiest filling.
Choose a smooth commercial creamy peanut butter for the most stable texture.
Allow all refrigerated ingredients to come to room temperature before mixing.
Chill the pie overnight for the cleanest slices.
Warm the knife under hot water and wipe it clean between slices.
Common Mistakes to Avoid
Using natural peanut butter, which can separate and produce a softer filling.
Skipping the chilling time before serving.
Pouring hot ganache directly onto the filling.
Not pressing the crust firmly enough.
Overmixing after folding in the whipped cream, which can reduce the light texture.
Recipe Variations
Use a graham cracker crust instead of a chocolate cookie crust.
Add a layer of sliced bananas beneath the peanut butter filling.
Mix mini chocolate chips into the filling.
Top with caramel drizzle.
Sprinkle flaky sea salt over the ganache.
Use dark chocolate for a richer flavor.
What to Serve With
- Fresh strawberries
- Raspberries
- Vanilla ice cream
- Hot coffee
- Espresso
- Cappuccino
- Cold milk
Storage
Cover the pie tightly and refrigerate for up to 5 days.
Freezing
Freeze the pie, tightly wrapped, for up to 2 months.
Thaw overnight in the refrigerator before serving.
Reheating
No reheating is necessary.
Serve chilled for the best texture and flavor.
Nutrition
Approximate per serving
- Calories: 485
- Protein: 8g
- Carbohydrates: 34g
- Fat: 37g
- Saturated Fat: 17g
- Fiber: 3g
- Sugar: 24g
- Sodium: 290mg
Frequently Asked Questions
Can I make this pie ahead of time?
Yes. This pie is an excellent make-ahead dessert and actually tastes even better after chilling overnight.
Which peanut butter works best?
Smooth, shelf-stable creamy peanut butter produces the most consistent texture. Natural peanut butter may separate and create a softer filling.
Can I use homemade whipped cream?
Absolutely. Freshly whipped heavy cream gives the filling a lighter texture and richer flavor than frozen whipped topping.
Why didn’t my pie set properly?
The pie may not have chilled long enough, or the whipped cream may have been under-whipped before being folded into the filling.
Can I use milk chocolate instead of semi-sweet chocolate?
Yes. Milk chocolate creates a sweeter pie, while dark chocolate produces a richer, more balanced flavor.
Conclusion
Chocolate and Peanut Butter Pie is a rich, creamy dessert that combines a crunchy chocolate cookie crust, fluffy peanut butter filling, and silky chocolate ganache into one unforgettable treat. Whether you’re preparing it for a holiday celebration, birthday, or weekend dessert, this easy no-bake pie delivers bakery-quality results with minimal effort. Its irresistible combination of flavors and textures makes it a recipe you’ll come back to again and again.